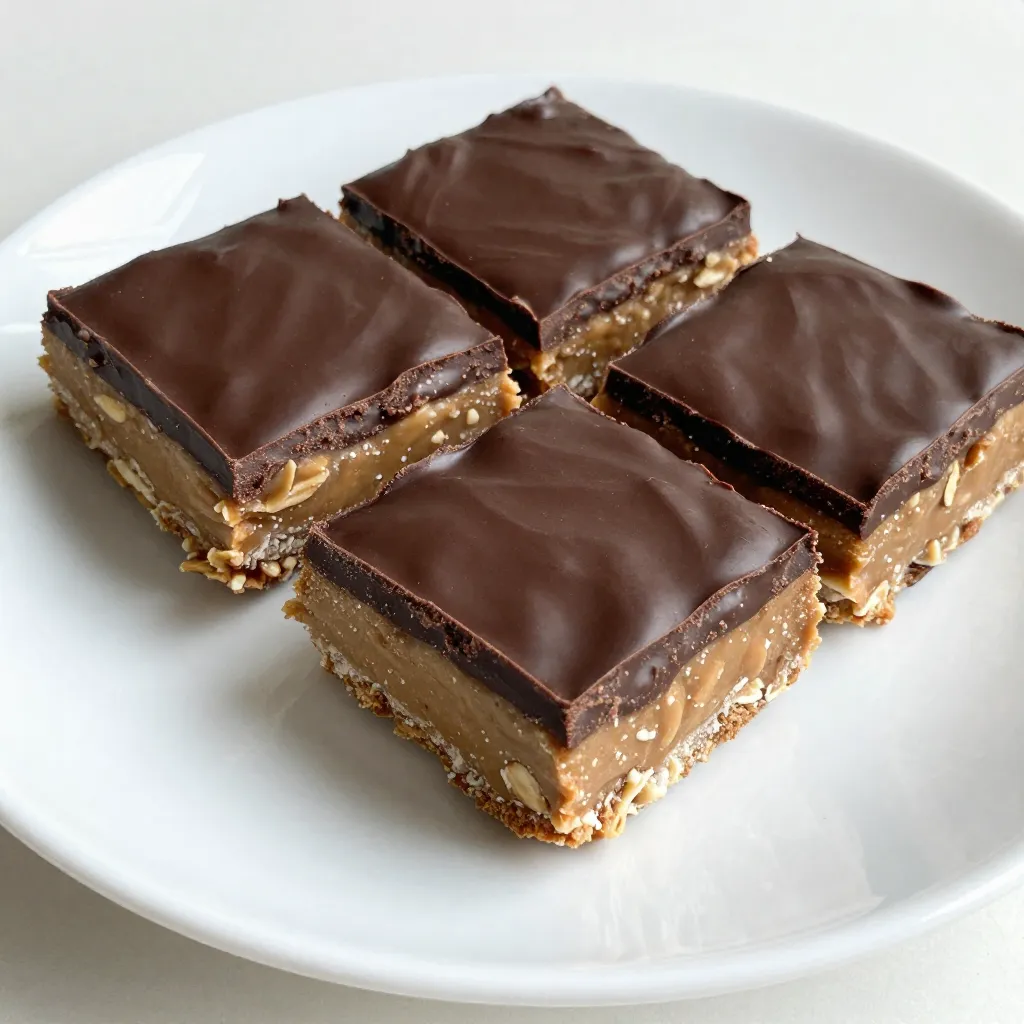
Want a quick and easy treat that satisfies your sweet tooth? These No-Bake Peanut Butter Bars are just what you need! With simple ingredients like creamy peanut butter and chocolate chips, you can whip them up in no time. Perfect for kids and adults, this recipe requires no oven and delivers a delicious taste. Let’s dive into the steps to create your new favorite dessert!
Why I Love This Recipe
- Quick and Easy: This recipe takes only 15 minutes to prepare, making it a perfect last-minute treat.
- Healthy Ingredients: Made with wholesome ingredients like oats and peanut butter, these bars are a nutritious snack.
- No Baking Required: Skip the oven and save time; these bars set in the fridge without any baking involved.
- Customizable: Feel free to swap out ingredients, like using almond butter or adding dried fruits for a twist.
Ingredients
List of Ingredients
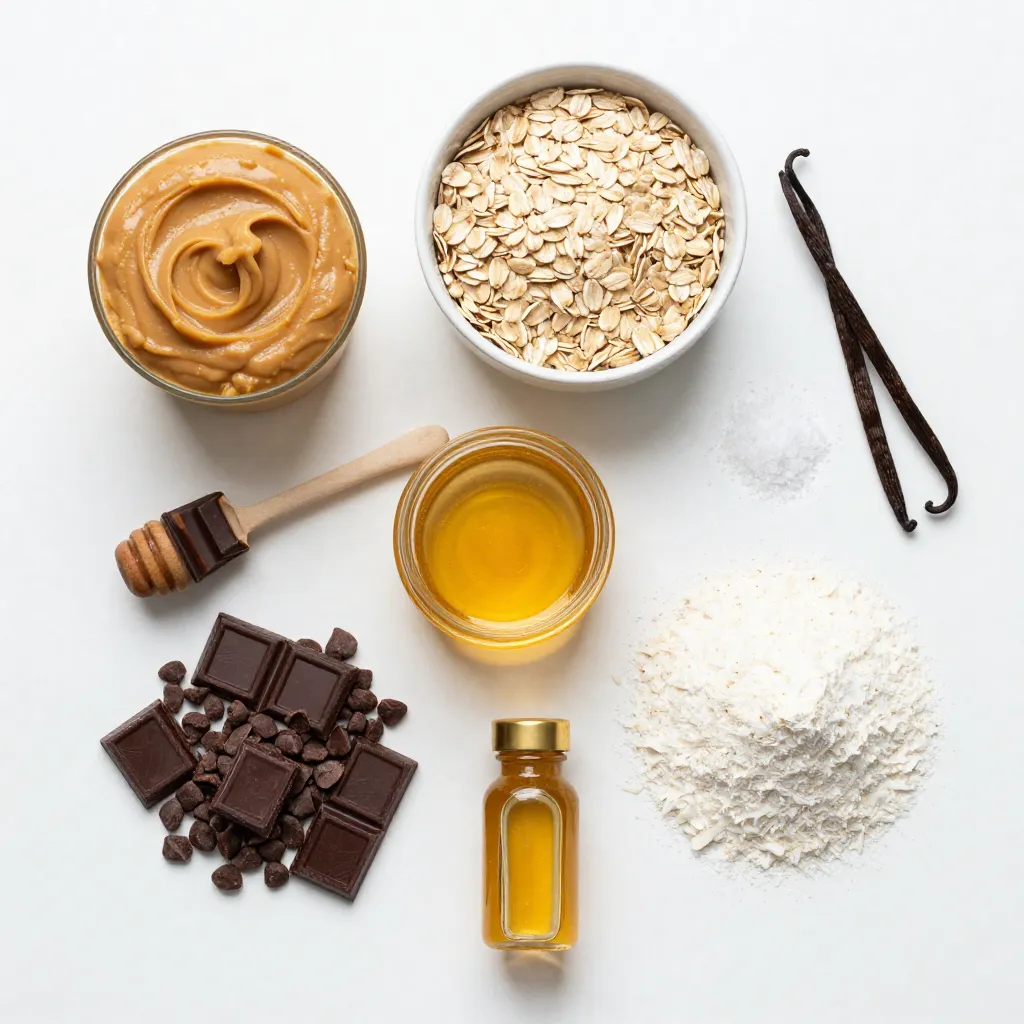
– 1 cup creamy peanut butter
– 1 cup rolled oats
– 1/2 cup honey or maple syrup
– 1/2 cup dark chocolate chips
– 1/4 cup coconut flour
– 1 teaspoon vanilla extract
– A pinch of salt
No-bake peanut butter bars are simple and fun to make. First, gather your ingredients. You will need creamy peanut butter, rolled oats, honey or maple syrup, dark chocolate chips, coconut flour, vanilla extract, and salt. Each item plays a big role in flavor and texture.
Creamy peanut butter gives the bars a rich taste. Rolled oats add fiber and a nice chew. Honey or maple syrup acts as the sweetener and keeps the bars together. Dark chocolate chips provide a sweet, chocolaty layer on top.
Coconut flour helps to thicken the mix and adds a hint of coconut flavor. Vanilla extract enhances all the flavors, while the pinch of salt balances the sweetness. When you combine these ingredients, you get a tasty treat that you can feel good about.
These bars are great for snacks or dessert. Plus, they are easy to customize! You can add nuts or dried fruit if you like. Get ready to mix and enjoy the fun of no-bake peanut butter bars!
Step-by-Step Instructions
Preparation Steps
– Combine peanut butter, honey, and vanilla extract
In a medium bowl, mix 1 cup of creamy peanut butter, 1/2 cup of honey, and 1 teaspoon of vanilla extract. Stir until the mix is smooth. This step is key for flavor.
– Mix in oats, coconut flour, and salt
Next, add 1 cup of rolled oats, 1/4 cup of coconut flour, and a pinch of salt. Mix well until everything blends together. The mixture should feel thick and sticky. This thickness helps the bars hold their shape.
– Prepare the baking dish
Line an 8×8-inch baking dish with parchment paper. Leave some paper hanging over the edges. This will help you lift the bars out later.
– Press the mixture into the dish
Spread the thick mixture evenly into the lined dish. Use a spatula or your hands to press it down firmly. This creates a solid base for your bars.
– Melt dark chocolate and pour over the mixture
In a microwave-safe bowl, melt 1/2 cup of dark chocolate chips. Heat in 20-second bursts, stirring between each time. When smooth, pour the chocolate over your pressed mixture. Use a spatula to spread it evenly.
– Chill in the refrigerator
Place the dish in the fridge for at least 1-2 hours. This helps the bars set well. Once firm, lift them out using the parchment paper. Cut into squares or rectangles for serving.
Tips & Tricks
Essential Tips for Perfect Bars
– Choosing the right peanut butter: Use creamy peanut butter for a smooth texture. Natural peanut butter works too, but may change the bars’ final texture. Avoid peanut butter with added sugar or oils for the best results.
– Ensuring the mixture is thick enough: Mix until your dough is thick and sticky. If it feels too loose, add a bit more coconut flour or oats. You want it to hold together well when pressed into the dish.
– Melting chocolate correctly: Melt the chocolate in a microwave on low heat. Stir every 20 seconds to avoid burning. Properly melted chocolate creates a nice shiny glaze on your bars.
Customization Ideas
– Using different nut butters: Almond butter, cashew butter, or sunflower seed butter can replace peanut butter. Each gives a unique taste and texture. Try them out to find your favorite.
– Adding mix-ins like nuts or dried fruit: Toss in some chopped nuts or dried fruit for extra flavor. Walnuts, almonds, or cranberries work great. Just keep the total amount about a half cup.
– Alternative sweeteners: If you want a lower glycemic index, try using agave syrup or coconut sugar. Adjust the amount as needed to keep the sweetness balanced.
Pro Tips
- Use Natural Peanut Butter: Opt for natural peanut butter without added sugars or oils for a healthier option and a more authentic peanut flavor.
- Chill Thoroughly: Allow the bars to chill in the refrigerator for at least 2 hours to ensure they set properly and can be cut without crumbling.
- Experiment with Add-ins: Feel free to add in extras like dried fruits, seeds, or protein powder to customize the bars to your taste and nutritional needs.
- Store Properly: Keep the bars in an airtight container in the refrigerator for up to a week, or freeze them for longer storage.
Serving Suggestions
Presentation Ideas
I love serving these no-bake peanut butter bars chilled on a nice platter. The coolness makes them so refreshing. You can add a drizzle of chocolate on top for a gourmet look. If you want extra crunch, sprinkle some crushed nuts over the bars. It not only looks good but also adds great taste. For gifting, package them in clear cello bags. Tie a pretty ribbon around them to make a lovely homemade gift.
Pairing Suggestions
When it comes to drinks, these bars go well with a glass of cold milk. You can also serve them with almond milk for a nutty twist. For a sweet touch, try pairing them with a cup of coffee or tea. As for snacks or desserts, fresh fruit like apples or bananas complements them nicely. You could even serve them with a scoop of vanilla ice cream for a fun dessert.
Storage Info
How to Store No-Bake Peanut Butter Bars
To keep your no-bake peanut butter bars fresh, store them in the fridge. Place the bars in an airtight container. Make sure they are covered well. This will help them stay fresh and tasty. They will last longer if you keep them cold. If you want to freeze them, wrap the bars tightly in plastic wrap. Then, place them in a freezer-safe bag. They can stay in the freezer for up to three months.
Expiration and Freshness Tips
In the fridge, these bars can last up to one week. Check for signs of spoilage before you eat them. If you see mold or they smell off, it’s time to toss them. The bars might also become dry or hard if they sit too long. Always trust your senses when checking for freshness.
FAQs
Common Questions About No-Bake Peanut Butter Bars
Can I substitute the sweetener?
Yes, you can use maple syrup or agave nectar. These options work well in this recipe. If you prefer a sugar-free option, look for a suitable sweetener like stevia. Just adjust the amount to taste, since some sweeteners are stronger than others.
How do I know when they are set?
The bars are ready when they feel firm to the touch. After chilling for 1-2 hours, check by gently pressing down in the middle. If it holds its shape, it’s set! If not, return it to the fridge for a bit longer.
Can I make these bars vegan?
Absolutely! To make these bars vegan, use maple syrup instead of honey. For the chocolate, choose dairy-free dark chocolate chips. This way, you keep all the great flavors without any animal products.
What are some allergy-friendly alternatives?
If you have nut allergies, try using sunflower seed butter. For gluten-free options, ensure your oats are certified gluten-free. You can also skip the chocolate or use carob chips for a different taste. Always check labels to be safe.
These no-bake peanut butter bars are simple and fun to make. By mixing just a few ingredients, you can create a tasty treat. Remember the tips for perfecting your bars and feel free to customize them. You can serve them chilled, paired with drinks or as gifts. Store them properly to keep them fresh, and check for spoilage signs. These bars are easy to adapt for all needs. Enjoy making and sharing this delicious recip