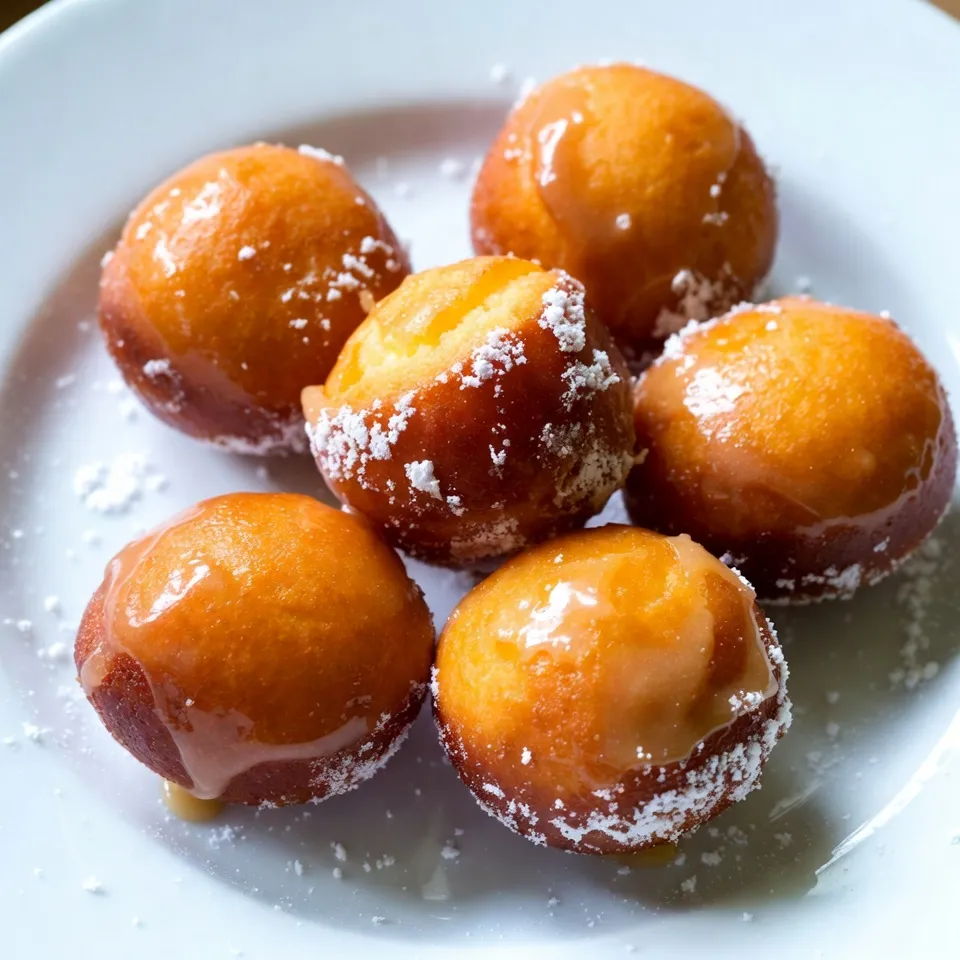
Get ready for a sweet adventure! Maple glazed donut holes are the ultimate treat for your taste buds. These little bites burst with flavor and warmth, making them hard to resist. In this post, I’ll walk you through simple ingredients and easy steps to create these delicious delights. Whether you want to impress guests or enjoy a cozy snack, you’ll love making these treats. Let’s dive in!
Why I Love This Recipe
- Delicious Flavor: The combination of maple syrup with warm, soft donut holes creates an irresistible sweet treat.
- Easy to Make: This recipe is straightforward and requires minimal ingredients, making it perfect for bakers of all levels.
- Perfect for Any Occasion: Whether it’s a weekend breakfast or a special gathering, these donut holes are a hit with everyone.
- Customizable: You can easily adjust the glaze or add toppings to suit your personal taste!
Ingredients
Main Ingredients for Maple Glazed Donut Holes
To make tasty maple glazed donut holes, you need a few key items. Here’s the list:
– 1 cup all-purpose flour
– 1/4 cup granulated sugar
– 1 tablespoon baking powder
– 1/2 teaspoon salt
– 1/2 teaspoon ground cinnamon
– 1/4 teaspoon nutmeg
– 1/2 cup whole milk
– 1 large egg
– 2 tablespoons unsalted butter, melted
– 1 teaspoon vanilla extract
– Oil for frying
These ingredients create a soft and fluffy donut that melts in your mouth.
Additional Ingredients for the Maple Glaze
The glaze adds sweet maple flavor. Here’s what you need for it:
– 1 cup powdered sugar
– 2 tablespoons pure maple syrup
– 1-2 tablespoons milk (as needed for consistency)
This glaze gives a shiny finish and a rich taste.
Ingredient Substitutions and Tips
You can switch some ingredients if needed. Here are some ideas:
– Use almond milk or oat milk instead of whole milk. This works well for dairy-free diets.
– Swap granulated sugar with brown sugar for a deeper flavor.
– If you don’t have nutmeg, you can use extra cinnamon.
– For a vegan option, use a flax egg in place of the large egg.
These tips help you make the recipe your own. Enjoy experimenting with flavors!

Step-by-Step Instructions
Preparation of Donut Hole Batter
Start with a large bowl. Add 1 cup of all-purpose flour, 1/4 cup of granulated sugar, 1 tablespoon of baking powder, 1/2 teaspoon of salt, 1/2 teaspoon of ground cinnamon, and 1/4 teaspoon of nutmeg. Mix these dry ingredients well. In another bowl, whisk together 1/2 cup of whole milk, 1 large egg, 2 tablespoons of melted unsalted butter, and 1 teaspoon of vanilla extract until smooth. Pour the wet mix into the dry mix. Stir gently until combined. It’s okay if there are small lumps; do not overmix.
Frying the Donut Holes
Heat oil in a deep fryer or heavy pot to 350°F (175°C). Use a small cookie scoop or two teaspoons to drop balls of dough into the hot oil. Be careful not to overcrowd the pan. Fry the donut holes for about 3-4 minutes until they are golden brown. Turn them occasionally for even cooking. Once done, use a slotted spoon to remove them and place them on a paper towel-lined plate to drain excess oil.
Making the Maple Glaze
In a separate bowl, whisk together 1 cup of powdered sugar, 2 tablespoons of pure maple syrup, and enough milk to get a smooth glaze. Start with 1 tablespoon of milk and add more if needed for the right consistency. Once the donut holes are cool to the touch, dip them into the maple glaze. Let any excess glaze drip off, then place them on a wire rack to set. Enjoy the rich, sweet flavor with each delightful bite!
Tips & Tricks
Achieving the Perfect Fry
Frying your donut holes just right is key. Heat your oil to 350°F (175°C). Use a thermometer for accuracy. If the oil is too hot, the outside burns before the inside cooks. If it’s too cool, the donut holes absorb too much oil, making them greasy. Drop the dough gently into the hot oil. Don’t overcrowd the pan. This ensures even cooking and a fluffy texture.
Tips for a Smooth Maple Glaze
To create a smooth maple glaze, use powdered sugar. It mixes easily and gives a nice shine. Start with one cup of powdered sugar. Add two tablespoons of pure maple syrup for flavor. Then, add one or two tablespoons of milk. This helps reach the right consistency. Mix until smooth. If it’s too thick, add more milk a little at a time.
Common Mistakes to Avoid
Avoid overmixing the dough. This can lead to tough donut holes. Small lumps in the batter are fine. Also, don’t skip letting the donut holes cool before glazing. If they are too hot, the glaze will melt away. Lastly, ensure your oil is the right temperature. This is vital for cooking them perfectly without grease.
Pro Tips
- Use Fresh Ingredients: Ensure that your baking powder is fresh for the best rise and texture in your donut holes.
- Monitor Oil Temperature: Use a thermometer to keep the oil at a consistent 350°F (175°C) for perfectly fried donut holes without becoming greasy.
- Don’t Overmix: Mix the batter until just combined to keep your donut holes light and fluffy; lumps are okay!
- Glaze While Warm: Dip the donut holes into the glaze while they are still warm for better adhesion and flavor absorption.
Variations
Flavor Variations
You can change the flavor of your donut holes for fun. Try adding cocoa powder for chocolate donut holes. Just replace a bit of flour with it. For a fall treat, use pumpkin puree instead of milk. It gives a soft texture and a warm spice taste. You can also add orange zest for a fresh twist. The options are endless!
Alternative Toppings and Glazes
If you want to mix it up, try different toppings. Instead of maple glaze, use a chocolate glaze. Melt dark chocolate and dip the donut holes in it. You can also sprinkle crushed nuts or coconut flakes on top. For a fruity touch, drizzle with raspberry or lemon glaze. Each option adds new flavors and colors to your treats.
Healthier Options
If you want a lighter version, try baking instead of frying. Use the same dough and form it into balls. Place them on a baking sheet and bake at 350°F for about 12-15 minutes. This makes them airy and soft with less oil. You can also swap out regular milk for almond or oat milk. Enjoy guilt-free donut holes that still taste great!
Storage Info
Best Ways to Store Donut Holes
To keep your maple glazed donut holes fresh, place them in an airtight container. This will help to maintain their soft texture. You can store them at room temperature for up to two days. If you want them to last longer, you can refrigerate them. Just remember to wrap them well to avoid drying out.
Freezing Instructions for Donut Holes
Freezing donut holes is easy! First, let them cool completely. Then, place them in a single layer on a baking sheet. Freeze them for about an hour. Once frozen, transfer them to a freezer bag. This way, you can enjoy them later. They will stay fresh for up to three months.
How to Reheat for Freshness
To reheat your donut holes, pop them in the microwave for 10-15 seconds. This will warm them up nicely. If you want them crispy again, you can use the oven. Preheat it to 350°F (175°C) and bake them for 5-7 minutes. The glaze will melt slightly, making every bite delightful!
FAQs
Can I use a different type of milk for the recipe?
Yes, you can. Almond milk or oat milk works well in this recipe. These options add a nice twist to the flavor. Just make sure to choose unsweetened versions to keep the taste balanced.
How long can I store the maple glazed donut holes?
You can store these donut holes for up to three days. Keep them in an airtight container at room temperature. If you want to keep them longer, try freezing them. They freeze well for about a month.
What can I serve with donut holes?
Donut holes pair great with coffee or tea. You can also serve them with fresh fruit or whipped cream. For a fun twist, try dipping them in chocolate sauce.
Can I make donut holes without frying?
Yes, you can bake them instead. Preheat your oven to 350°F (175°C). Use a donut hole pan and fill each cavity with the batter. Bake for about 10-12 minutes. They will be a bit different but still tasty!
In this blog post, we explored how to make tasty maple glazed donut holes. We covered the main and additional ingredients, plus helpful tips for making a great glaze. You learned step-by-step frying and preparation methods, along with common mistakes to avoid. We also discussed flavor variations, storage techniques, and answered common questions. Enjoy experimenting with different toppings and glazes. With these tips, you can create delicious treats that everyone will love. Happy cookin