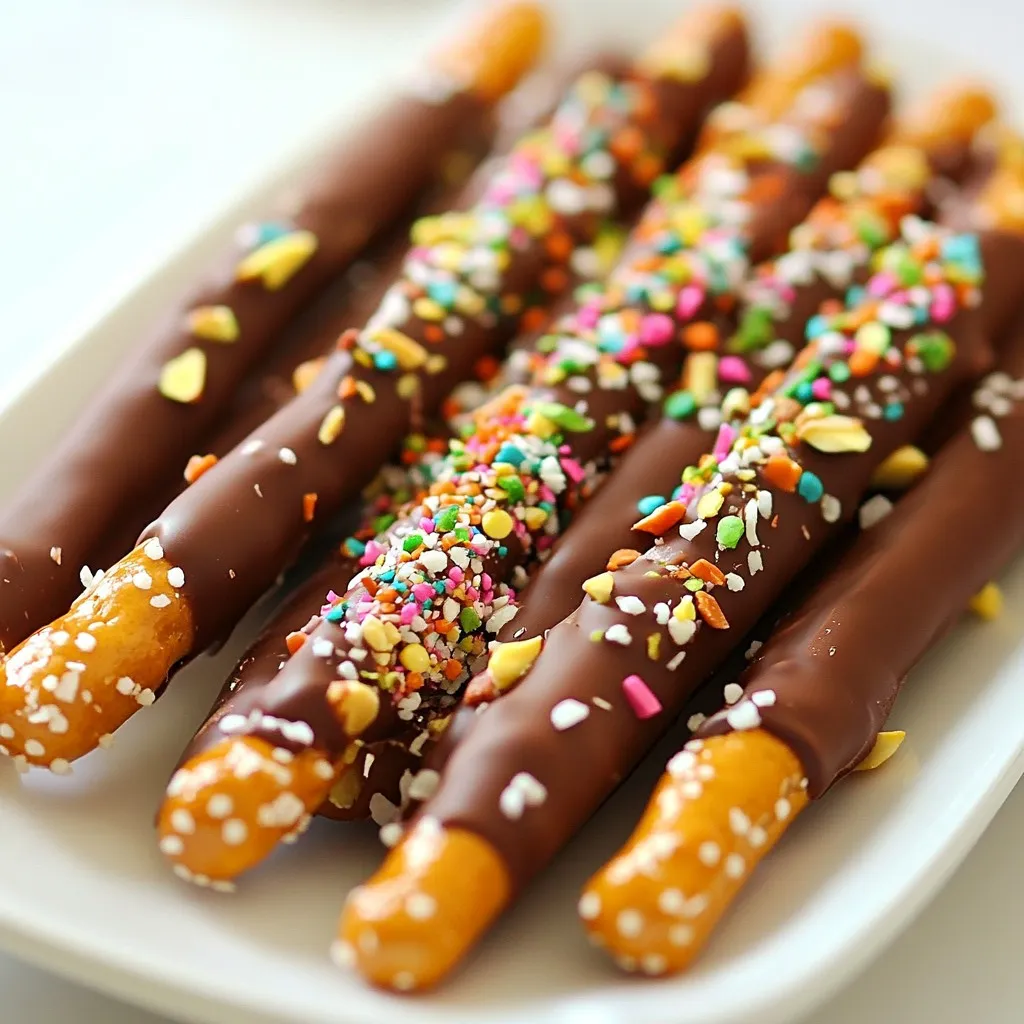
Looking for a simple and fun treat? Chocolate dipped pretzel rods are the answer! These sweet-and-salty snacks are easy to make and perfect for any occasion. You just need a few ingredients, and you’ll have a tasty treat everyone will love. Join me as I guide you through the process, from melting chocolate to adding fun toppings. Get ready to impress your friends and family with this quick and delicious recipe!
Why I Love This Recipe
- Easy to Make: This recipe requires minimal ingredients and can be prepared in just 15 minutes, making it perfect for a quick treat.
- Customizable Toppings: You can mix and match toppings like nuts and sprinkles to suit your taste or occasion, adding a personal touch.
- Fun for All Ages: Dipping pretzel rods is a fun activity that kids and adults alike can enjoy, making it a great family project.
- Perfect for Gifting: These chocolate-dipped pretzel rods make a delightful homemade gift for friends and family during the holidays or special occasions.
Ingredients
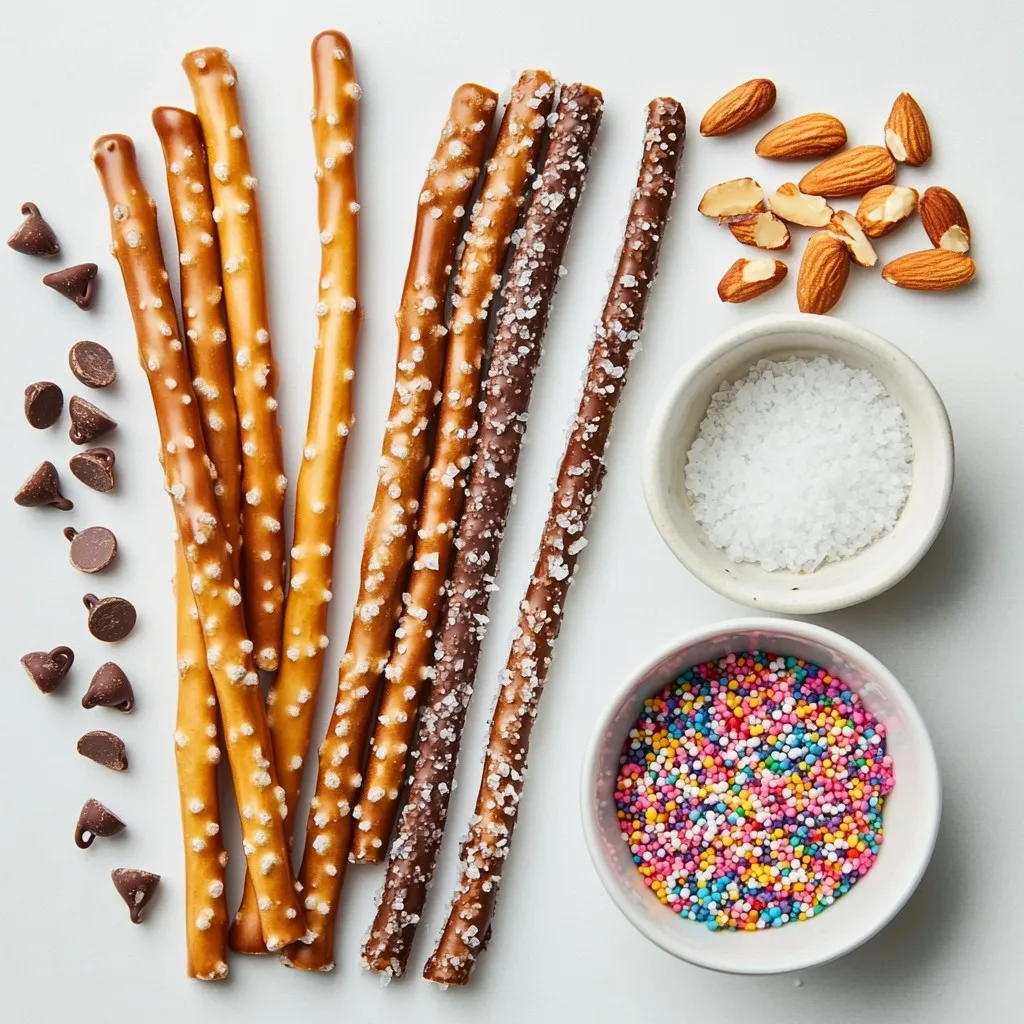
List of Ingredients
– 12 pretzel rods
– 1 cup semi-sweet chocolate chips
– 1 tablespoon coconut oil
– 1/2 cup crushed nuts (e.g., almonds, pecans, or pistachios)
– 1/2 cup colorful sprinkles
– 1/4 teaspoon sea salt (optional)
These ingredients make a tasty treat. You need pretzel rods as your base. They give a nice crunch. The semi-sweet chocolate chips are perfect for dipping. They melt easily and taste great. Coconut oil helps the chocolate melt smooth. This makes it easy to dip.
Crushed nuts add extra flavor and texture. You can use almonds, pecans, or pistachios. Colorful sprinkles bring fun to the pretzels. They make your treat look lively. A pinch of sea salt can make the sweet taste pop. It adds a nice balance.
Gather these ingredients before you start. You’ll enjoy making this simple and fun treat!
Step-by-Step Instructions
Preparing Your Workspace
First, get ready. Line a baking sheet with parchment paper. This will keep your pretzels from sticking. Make sure you have all your tools nearby. You will need a microwave-safe bowl and a spoon. A clean workspace helps keep things neat.
Melting the Chocolate
Now, let’s melt the chocolate. In the microwave-safe bowl, mix the chocolate chips and coconut oil. Heat it in the microwave for 30 seconds. Take it out and stir. Repeat this until it is smooth. This should take about 1-2 minutes. Be careful not to burn the chocolate.
Dipping the Pretzels
Grab a pretzel rod. Hold it at both ends. Dip it into the melted chocolate, covering about two-thirds. Let the extra chocolate drip back into the bowl. This gives you a nice coat without too much mess.
Adding Toppings
Now comes the fun part! Roll your chocolate-dipped pretzel in crushed nuts or colorful sprinkles. Press gently to make sure they stick. If you like, add a sprinkle of sea salt on top. This adds a tasty touch.
Setting the Pretzels
Place your dipped pretzel on the parchment paper. Make sure they have some space. Repeat this for all the pretzel rods. Each one should be nicely coated and ready for the next step.
Cooling and Hardening
Time to cool them down! Put the baking sheet in the fridge. Chill the pretzels for about 30 minutes. This helps the chocolate harden. You want them to be firm and ready to eat.
Serving or Storing
Enjoy your pretzels right away! If you want to save them, put them in an airtight container. They will stay fresh for up to a week. Perfect for snacks or sharing with friends!
Tips & Tricks
Achieving the Perfect Melt
To melt chocolate well, you need a few things. First, use a microwave-safe bowl. Combine the chocolate chips and coconut oil, then heat it. Heat in 30-second bursts. Stir after each burst until smooth. This should take about 1-2 minutes. The coconut oil helps the chocolate melt evenly and adds shine. If your chocolate is too thick, add a bit more oil.
How to Dip Like a Pro
When you dip the pretzel, hold it at both ends. Dip it into the melted chocolate, covering about 2/3 of the rod. Let excess chocolate drip back into the bowl. This keeps it neat and avoids too much mess. Don’t rush this step; a steady hand gives a clean look. You can even twirl the pretzel to get a nice coat.
Choosing the Right Toppings
Choose toppings that you love! You can use crushed nuts like almonds, pecans, or pistachios. Colorful sprinkles also add fun and joy. If you want a sweet and salty mix, sprinkle a bit of sea salt on top before the chocolate sets. Think about seasonal toppings too; crushed candy canes are great for winter!
Pro Tips
- Use Quality Chocolate: Opt for high-quality chocolate chips for the best flavor and a smooth melting experience.
- Experiment with Flavors: Try adding a splash of vanilla extract or a pinch of cinnamon to the melted chocolate for an extra flavor boost.
- Keep it Cool: If your kitchen is warm, consider placing the chocolate in the fridge for a few minutes to help it set faster.
- Mix and Match Toppings: Get creative with your toppings! Use crushed cookies, dried fruits, or even coconut flakes for variety.
Variations
Flavored Chocolate Options
You can play with flavors for your chocolate. Try white chocolate for a sweet twist. You can also use dark chocolate for a richer taste. Add a few drops of vanilla or almond extract while melting. This small change adds a nice flavor boost.
Alternative Toppings
Toppings make your pretzels unique. You can use crushed cookies like Oreos or graham crackers. Shredded coconut also adds a nice touch. Try mini chocolate chips for extra sweetness. You can mix and match to find your favorite combo.
Seasonal Variations
Seasonal themes can make your treats festive. For Halloween, use orange and black sprinkles. During Christmas, add red and green sprinkles. In spring, use pastel colors for a bright look. You can even drizzle some melted chocolate over the top for extra flair.
Storage Info
Best Storage Practices
To keep your chocolate dipped pretzel rods fresh, store them in an airtight container. This will help prevent them from becoming stale. Place layers of parchment paper between the pretzels. This prevents them from sticking together. Keep the container in a cool, dry place. Avoid direct sunlight to maintain their taste and texture.
Shelf Life of Dipped Pretzel Rods
Chocolate dipped pretzel rods last up to one week when stored properly. After this time, they may become soft or lose their crunch. If you notice any signs of spoilage, such as off smells or discoloration, it’s best to toss them. You want to enjoy these treats at their best.
Freezing Instructions
You can freeze chocolate dipped pretzel rods for longer storage. Wrap each pretzel in plastic wrap, then place them in a freezer bag. Make sure to remove as much air as possible before sealing. They can stay good in the freezer for up to three months. When ready to eat, thaw them in the fridge for a few hours. This keeps the chocolate nice and firm. Enjoy your treats fresh!
FAQs
Can I use different types of chocolate?
Yes, you can use many types of chocolate. Dark chocolate, milk chocolate, or white chocolate all work well. Each type gives a different taste and look. You can mix chocolates too for a fun twist! Just remember to melt them carefully, so they stay smooth.
How long do chocolate-dipped pretzels last?
Chocolate-dipped pretzels stay fresh for about a week. Store them in an airtight container to keep them crunchy. If you see any signs of moisture, eat them right away! They taste best when fresh.
Where can I buy chocolate-dipped pretzel rods?
You can find chocolate-dipped pretzel rods at many stores. Look in the snack aisle or the bakery section. Some candy shops also sell them. If you want a special flavor, try local bakeries. They may have unique options that you’ll love!
Can I make these gluten-free?
Yes, you can make these gluten-free! Just use gluten-free pretzel rods. Many brands offer tasty gluten-free options. Make sure to check the label to ensure they are truly gluten-free. Enjoy this treat without worry!
You’ve learned how to make chocolate-dipped pretzel rods with simple steps. We covered ingredients, melting chocolate, dipping, and adding toppings. I shared tips for perfect results and fun variations to try. Remember, these treats are easy to store for later. Enjoy your tasty creations and impress friends with your skills. Making snacks can be fun and rewardin